Friday, May 6, 2011

From Bed Post To Candle Sticks


Crafting Moment!

Candle Sticks
I was out Thrifting the other day and came across this Bed/head & foot board....

My mind started racing....There is so many thing I could do with it. I could keep it a bed~Make it a Bench~But with the chunky spindles I knew I was going to Get me some  
Chunky Candle Sticks!!!
First I got my "Man Tool" and we were off to work.
 It was kinda tricky figuring out the cuts that would make the best candles but we finally figured it out.
We filled all of the holes with this Rock Hard Water Putty
When it was dry we sanded it smooth.
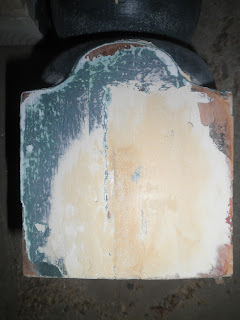
Next we cut out the bases for the sticks to sit on. We used the middle of the head board for this, it help keep the same texture and it was being resourceful. 
We cut 2 squares for each stick, a large and a small about 1 inch different.
 Then we attached the bases to the sticks.We used wood glue
and then a nail gun to make sure they were secured.
Also some wedged to keep them level.
Then they were ready to prep for paint. A little bit of caulk around all of the cracks.
Started with a primer

Final Coat and Glaze

I got lucky and found three matching glass vases at good will. 
If you cant find matching I think it would be cute to mix and match.


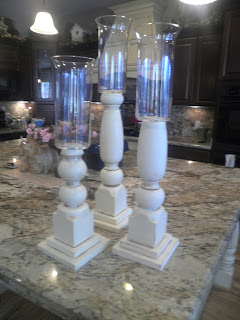
Attached them to the top of the sticks with E-6000 glue.
 
And.........
Wha La!
I was able to make these out off chair legs using the same concept.
Happy Crafting.....

Saturday, April 30, 2011

Craft Room Makeover!


 It's A bird, it's a plan, it's......
Super Mandi!
from her blog  "Vintage Revivals"

Here to save the day!
with her 
***Epic Room Makeover Giveaway***


Just in time, I have always wanted a craft room!
Something like this from

or this one from
 I love this Craft Table from
We moved into our house about 4 years ago, and we finally have an extra room just for ME!
A craft room of my very own......

I cant believe I just showed you that!
When people come over this is what they see
It has become more of a storage room then anything else.
Its what I call "Organized Clutter"
(I can find anything, I know where everything is)
Ether way it is a "Monkey On My Back"
I have a little bit of hoarder in me when it comes to crafts stuff.
I need storage, I need organization!
I need to be able to "craft" in my "craft room" and not drag it out to my kitchen counters when I do a project.
and doing it in style will make it that much better!

PLLLEEEAAASSSEEEEE Help!
Oh  & I  Love Your Guts!

Thursday, March 3, 2011

Souped up Baby Onesie!

Baby Onesie /Head Band

Crafting Moment!

I needed a baby gift for a friend, and I have seen some pretty cute stuff out there in the crafty world of blogging made with the silhouette and their new heat transfer.
So I thought I would give it a shot and this is what I got!
And this is how I did it.....
First I ironed my heat transfer on to the back of the materiel. I put a towel down so no sticky stuff would get on my ironing board. (I learned that my freshman year in Home-Ec, I don't remember my teachers name but I'm sure she would be so proud!)
Then I peeled the paper stuff off the back (not sure of the technical name for this stuff)
 the heat transfer stays on the material.


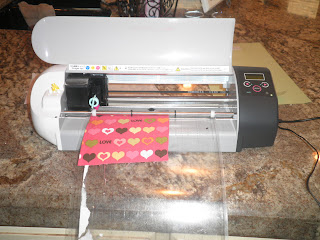
Next I pulled out my computer and Silhouette and cut out my design.
How Cool Is that a machine that cuts your material for you!
I chose 41-card_kit_Flower_C00572_20509 ~ eliminated the card part and just used the flower.
I thought the word FRESH, describes a new born pretty well, so chose a font and cut that out the same way.
Once all of my shapes where cut I placed them on the onsie and ironed them into place, and sewed around all the edges to tack it down.
instead of a plane fabric dot that came with the flower i decided to add a rolled Rosett in the middle.
 It was pretty easy, and cheap, and I ended up with a unique gift to give.


 Of course that wasn't good enough, a baby girl just isn't complete unless they are 
waring a headband the size of their head so i had to make one that matched.
I found a flower that would match and pulled it apart.


I Took off any green steam and plastic that holds it together. 
Glued the petals back together, this helps it to lay flat on your head.
 I wanted to add a little something to it and decided to use some feathers.
Synthetic feathers are messy, fluffy, and not very cute but if you look at the 
back of the bag it will tell you how to trim them up and shape them to be more usable.
I just ripped off the fluffy bottom and trimmed the tops to be more pointy, its pretty easy.
then glued them to the middle layer of the flower.
I glued the feathers to far out and had to pull them off and reset them closer to the middle.
Then I finished gluing the rest of the flower together. and to make it match the onsie I added a rolled Rosett to the middle.
Added some BLING
then added the clip to the back by covering it with ribbon, and attached it with hot glue.


I have a bunch of crochet headbands I found on-line somewhere??? attached it to that and....
ALL DONE.
EASY PEASY


Considering just about everyone I know is pregnant, and they are all having girls I guess I better get busy!